Double check that you have the correct bottles and review all instructions before collecting water samples. Use Ctrl+F on the keyboard to search for the bottle you received. Water collection bottles may have bottle specific instructions. It is important to read and understand the instructions to reduce risk of contamination, incorrect sampling, and rejection of samples. If you are missing a bottle or a bottle broke during transit, email cdphe_laborders@state.co.us.
Collection instructions by water package
General notes
- Wear gloves to minimize potential contamination.
- For bacteria samples, sample from a faucet or spigot that does not swing or have an aerator. Most kitchen faucets have both, so avoid them. Residual bacteria can be inside the aerator or around the fittings that allow the facet to swing. Sample from a spigot in a bathtub.
- Always sample from the cold water tap. Hot water is heated and stored in a water heater and does not directly come from the well. Hot water would not be an accurate well water sample for testing.
- Do not overfill or rinse out the bottles as some bottles contain strong acid or other preservatives.
- Refrigerate samples collected, except for metals and fluoride bottles.
- All organic testing is performed within a specific testing schedule and must be received within the dates specified.
- The State lab is closed on state holidays. Drop off samples in person at the lab no later than 3 p.m. on the business day before the holiday, or wait until the following business day to submit the sample. Do not ship water samples the business day before the holiday - the Lab will not be open to receive it.
After collection, properly label all water collection bottles and include a completed chain of custody for each sampling site. Some samples may have a short hold time, so take the samples to the State Lab immediately after collection. All bacteria samples and bottles labeled with “Short Holding Time” must be received at the State Lab within 24 hours of collection or they will be rejected.
Bacteria bottle
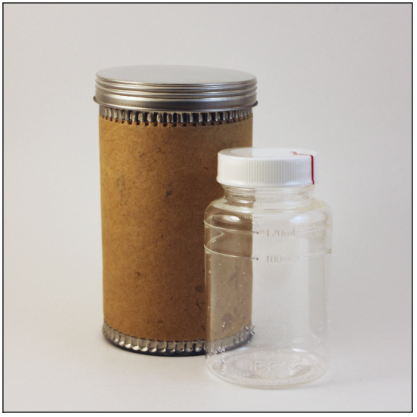
This bottle may be delivered in a cylindrical cardboard container. The bottle is sterilized and sealed. The bottle contains a preservative that appears as a white powder in the bottom of the bottle. Do not use it if the seal has been broken. Several substances can be tested with this one water collection.
This sample has a 26-hour hold time. The samples must be received within 24 hours of collection or they will be rejected. Take this sample to the lab immediately after collection. The lab accepts samples Monday through Friday, 8 a.m. to 3 p.m., except on State holidays. Plan accordingly. If you cannot drop samples off at the lab, ship samples overnight using FedEx, UPS, or USPS. Do not ship samples the business day before a weekend or State holiday as the lab will not be open to receive it.
- Do not have any animals or running fans in the room while collecting a water sample.
- Turn on the cold water and let it run for 3-5 minutes.
- Turn off the water, and clean the inside and outside of the spigot using rubbing alcohol. Do not use bleach as it will react with the reagent inside of the bacteria bottle.
- Once the alcohol has evaporated and the spigot looks dry, turn the cold water on to a slow, steady stream.
- Carefully remove the sterile wrap completely from the bottle cap.
- When removing the cap from the bottle, do not touch the inside of the cap or set it down on any surface. Hold the cap by its outside edges only. Do not rinse the bottle out before sampling.
- Fill the bottle between the 100 mL line (lower line on the bottle) and the 120 mL line (higher line on the bottle). Samples that are filled under the 100 mL or over the 120 mL line will be rejected.
- Immediately cap the bottle. Be sure the cap is securely tightened. Place it in a refrigerator or in a cooler with frozen cold packs for transport.
Brown plastic bottle
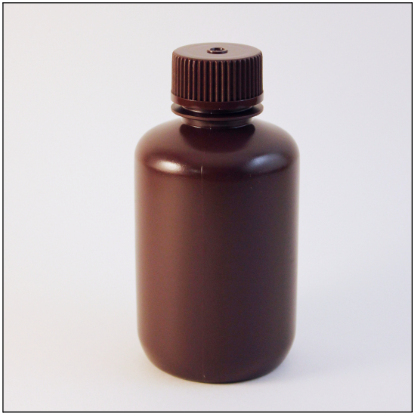
For bromate, bromite, bromide, chlorate, and chlorite.
- If this is the first sample to be collected, turn on the cold water and let it run for 3-5 minutes. If you are collecting from multiple bottles and have already let the water run, continue to step 2.
- Slow the flow of water before collecting.
- Fill the bottle to the shoulder. Do not overfill.
- Place the cap straight down on the bottle and securely tighten.
- Refrigerate the water sample immediately after sample collection.
Carbamate vial
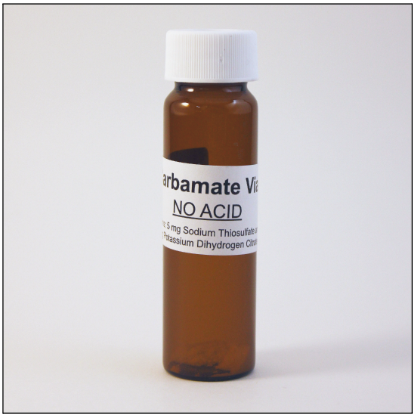
Included in the organic chemical rules package.
*Subject to the organic testing schedule. Plan accordingly.
- If this is the first sample to be collected, turn on the cold water and let it run for 3-5 minutes. If you are collecting from multiple bottles and have already let the water run, continue to step 2.
- Slow the flow of water before collecting.
- Do not rinse the vial prior to collecting. The vial contains preservatives that are necessary for testing.
- Fill to the top of the vial, but do not overfill.
- Place the cap straight down on the vial and securely tighten.
- Refrigerate the water sample immediately after sample collection.
Dalapon vial
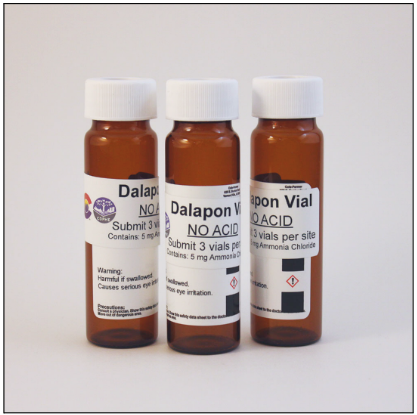
Included in the organic chemical rules package. Three vials must be collected and submitted per sampling location.
*Subject to the organic testing schedule. Plan accordingly.
- If this is the first sample to be collected, turn on the cold water and let it run for 3-5 minutes. If you are collecting from multiple bottles and have already let the water run, continue to step 2.
- Slow the flow of water before collecting.
- Do not rinse the vial prior to collecting. The vial contains preservatives that are necessary for testing.
- Fill to the top of the vial, but do not overfill.
- Place the cap straight down on the vial and securely tighten.
- Refrigerate the water sample immediately after sample collection.
Diquat bottle
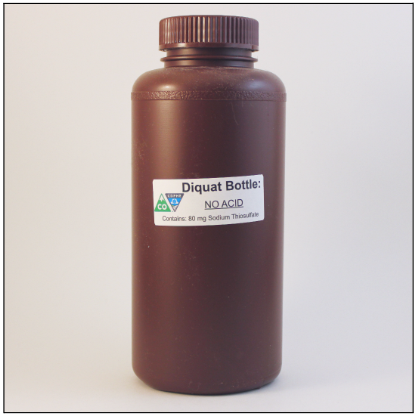
Included in the organic chemical rules package.
*Subject to the organic testing schedule. Plan accordingly.
- If this is the first sample to be collected, turn on the cold water and let it run for 3-5 minutes. If you are collecting from multiple bottles and have already let the water run, continue to step 2.
- Slow the flow of water before collecting.
- Do not rinse the bottle prior to collecting. The bottle contains preservatives that are necessary for testing.
- Fill the bottle to the bottom of the neck.
- Place the cap straight down on the bottle and securely tighten.
- Refrigerate the water sample immediately after sample collection.
Endothall bottle
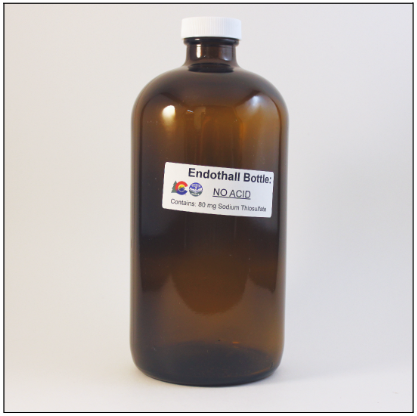
Included in the organic chemical rules package.
*Subject to the organic testing schedule. Plan accordingly.
- If this is the first sample to be collected, turn on the cold water and let it run for 3-5 minutes. If you are collecting from multiple bottles and have already let the water run, continue to step 2.
- Slow the flow of water before collecting.
- Do not rinse the bottle prior to collecting. The bottle contains preservatives that are necessary for testing.
- Fill the bottle to the bottom of the neck.
- Place the cap straight down on the bottle and securely tighten.
- Refrigerate the water sample immediately after sample collection.
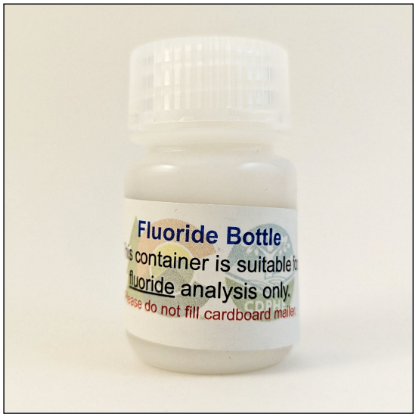
Fluoride bottle
- If this is the first sample to be collected, turn on the cold water and let it run for 3-5 minutes. If you are collecting from multiple bottles and have already let the water run, continue to step 2.
- Slow the flow of water before collecting.
- Fill the bottle to the bottom of the neck.
- Place the cap straight down on the bottle and securely tighten.
- Fluoride samples do not need to be refrigerated. However, if they are being shipped with samples that do need refrigeration, they can be packed in the same cooler.
Herbicide bottle, 1 L (with HCl acid dropper)
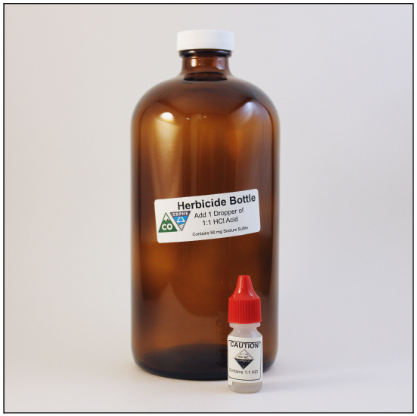
Included in the organic chemical rules package. Comes with an HCl acid dropper to add to the sampled water.
*Subject to the organic testing schedule. Plan accordingly.
- If this is the first sample to be collected, turn on the cold water and let it run for 3-5 minutes. If you are collecting from multiple bottles and have already let the water run, continue to step 2.
- Slow the flow of water before collecting.
- Do not rinse the bottle prior to collecting. The bottle contains preservatives that are necessary for testing.
- Fill to the bottom of the neck of the bottle.
- Add the entire dropper bottle of HCl to the herbicide bottle.
- Place the cap straight down on the bottle and securely tighten.
- Refrigerate the water sample immediately after sample collection.
HAA vial
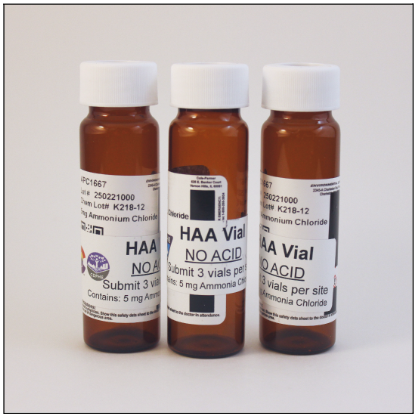
Included in the organic chemical rules package. Three HAA vials must be collected and submitted per sampling location.
*Subject to the organic testing schedule. Plan accordingly.
- If this is the first sample to be collected, turn on the cold water and let it run for 3-5 minutes. If you are collecting from multiple bottles and have already let the water run, continue to step 2.
- Slow the flow of water before collecting.
- Do not rinse the vial prior to collecting. The vial contains preservatives that are necessary for testing.
- Fill to the top of the vial, but do not overfill.
- Place the cap straight down on the vial and securely tighten.
- Refrigerate the water sample immediately after sample collection.
Metals bottle, 250 mL
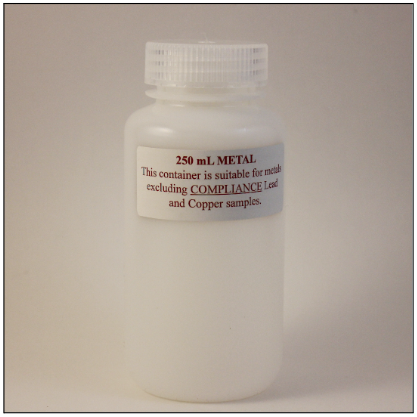
This bottle is used to test for all metals in private water sources.
Follow the collection instructions below for testing all metals, except lead and copper:
- If this is the first sample to be collected, turn on the cold water and let it run for 3-5 minutes. If you are collecting from multiple bottles and have already let the water run, continue to step 2.
- Slow the flow of water before collecting.
- Fill the bottle to the bottom of the neck. Do not overfill bottles.
- Place the cap straight down on the bottle and securely tighten.
- Metals samples do not need to be refrigerated. However, if they are being shipped with samples that do need refrigeration, they can be packed in the same cooler.
Metals bottle, 1 L
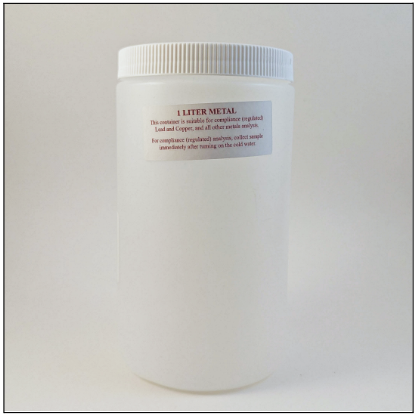
This bottle is used for regulatory copper and lead testing in drinking water.
Follow the collection instructions below for testing lead and/or copper:
- Allow for a period of at least six hours where no water is flushed through the home's pipes overnight or during the day, when the home is unoccupied.
- Collect the water from either a kitchen or bathroom cold-water faucet without letting the faucet run prior to collection.
- Hold the open bottle under the faucet, start the flow of water, and fill to the neck of the bottle.
- Place the cap straight down on the bottle and securely tighten.
Neutral bottle, 250 mL
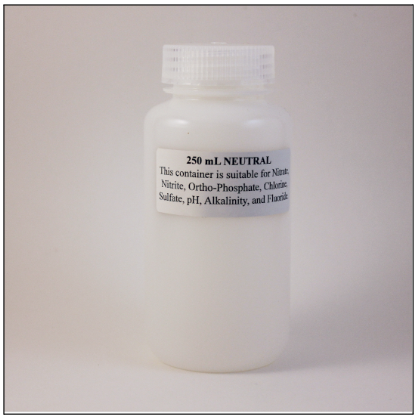
This bottle is used to test for alkalinity, conductivity, pH, chloride, fluoride, and sulfate.
- If this is the first sample to be collected, turn on the cold water and let it run for 3-5 minutes. If you are collecting from multiple bottles and have already let the water run, continue to step 2.
- Slow the flow of water before collecting.
- Fill the bottle to the bottom of the neck. Do not overfill bottles.
- Place the cap straight down on the vial and securely tighten.
- Refrigerate the water sample immediately after sample collection.
Neutral bottle, 250 mL — short holding time
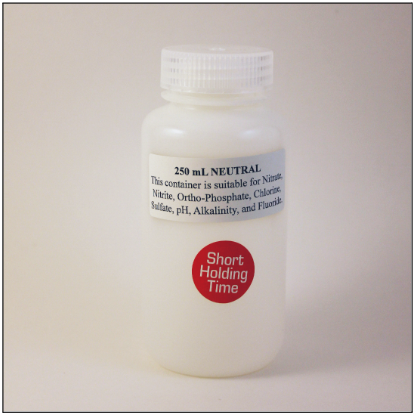
If a round red sticker that reads “Short Holding Time” is on the bottle, it is used to test for hexavalent chromium, nitrate, nitrite, UV 254, total chlorine, and ortho-phosphate. Neutral bottles with a red round sticker must be returned to the lab within 24 hours of water collection. If testing for total chlorine specifically, it must be returned to the lab within two hours of collection. We recommend transporting the samples immediately after collection. Plan accordingly.
- If this is the first sample to be collected, turn on the cold water and let it run for 3-5 minutes. If you are collecting from multiple bottles and have already let the water run, continue to step 2.
- Slow the flow of water before collecting.
- Fill the bottle to the bottom of the neck. Do not overfill bottles.
- Place the cap straight down on the vial and securely tighten.
- Refrigerate the water sample immediately after sample collection.
Neutral bottle, 1 L
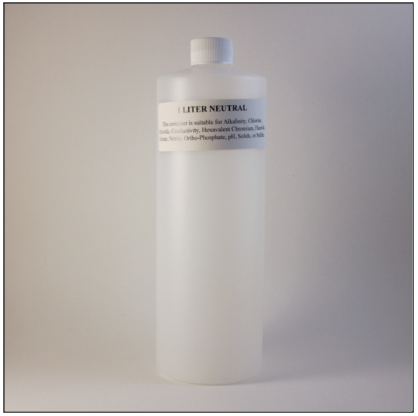
This bottle is used to test for total dissolved solids, total suspended solids, total solids, alkalinity, conductivity, pH, chloride, fluoride, and sulfate.
- If this is the first sample to be collected, turn on the cold water and let it run for 3-5 minutes. If you are collecting from multiple bottles and have already let the water run, continue to step 2.
- Slow the flow of water before collecting.
- Fill the bottle to the bottom of the neck. Do not overfill bottles
- Place the cap straight down on the vial and securely tighten.
- Refrigerate the water sample immediately after sample collection.
Nutrient bottle, 250 mL
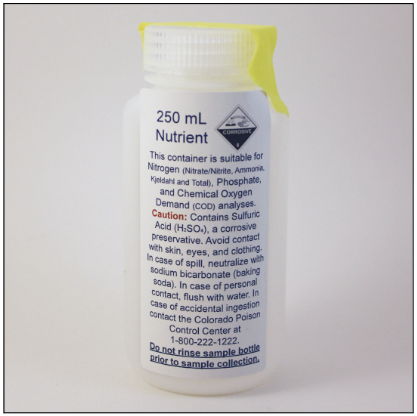
This bottle is used to test for nitrate/nitrite combined, ammonia, total kjeldahl nitrogen, and total phosphorus.
- If this is the first sample to be collected, turn on the cold water and let it run for 3-5 minutes. If you are collecting from multiple bottles and have already let the water run, continue to step 2.
- Slow the flow of water before collecting.
- This bottle contains a small amount of acid that is required for testing, so do not rinse out the bottle. If the acid comes into contact with skin, flush the area thoroughly with lukewarm water for 15 minutes.
- Fill the bottle to the bottom of the neck. Do not overfill bottles.
- Place the cap straight down on the vial and securely tighten.
- Refrigerate the water sample immediately after sample collection.
Follow the collection instructions below for testing lead and/or copper:
- Allow for a period of at least six hours where no water is flushed through the home's pipes overnight or during the day, when the home is unoccupied.
- Collect the water from either a kitchen or bathroom cold-water faucet without letting the faucet run prior to collection.
- Hold the open bottle under the faucet, start the flow of water, and fill to the neck of the bottle.
- Place the cap straight down on the bottle and securely tighten.
SVOC bottle, 1 L (with HCl dropper)
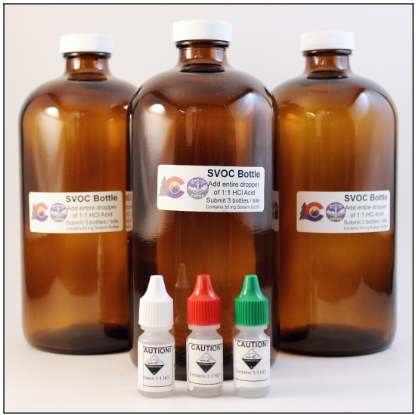
Included in the organic chemical rules package. It comes with an HCl acid dropper to add to the sampled water. Three SVOC bottles must be collected and submitted per sampling location.
*Subject to the organic testing schedule. Plan accordingly.
- If this is the first sample to be collected, turn on the cold water and let it run for 3-5 minutes. If you are collecting from multiple bottles and have already let the water run, continue to step 2.
- Slow the flow of water before collecting.
- Do not rinse the bottles prior to collecting. The bottles contain preservatives that are necessary for testing.
- Fill to the bottom of the neck of the bottle. Do not overfill.
- Add one entire dropper bottle of HCl to each SVOC bottle. There is one acid dropper bottle for each SVOC bottle.
- Securely tighten the cap on the bottle.
- Refrigerate the water sample immediately after sample collection.
Trace vial
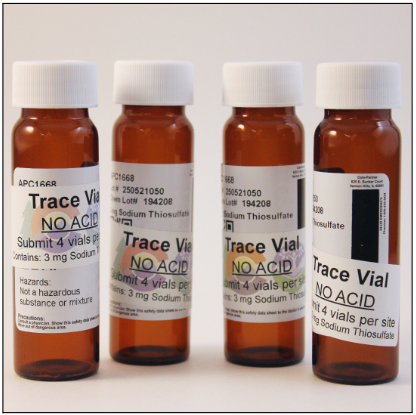
This vial is included in the organic chemical rules package. Four trace vials must be submitted for each sampling location.
*Subject to the organic testing schedule. Plan accordingly.
- If this is the first sample to be collected, turn on the cold water and let it run for 3-5 minutes. If you are collecting from multiple bottles and have already let the water run, continue to step 2.
- Slow the flow of water before collecting.
- Do not rinse the vial prior to collecting. The vial contains preservatives that are necessary for testing.
- Fill to the top of the vial, but do not overfill.
- Place the cap straight down on the vial and securely tighten.
- Refrigerate the water sample immediately after sample collection.
Trip blank vial
Two trip blank vials are included with every VOC/BTEX/TTHM sample set (pictured below).
- Do not open the trip blank vials.
- Pack the trip blank vials after collecting water samples in the VOC/BTEX/TTHM vials. Use the bubble wrap packaging that the bottles arrived in.
VOC/BTEX/TTHM vial (with acid dropper)
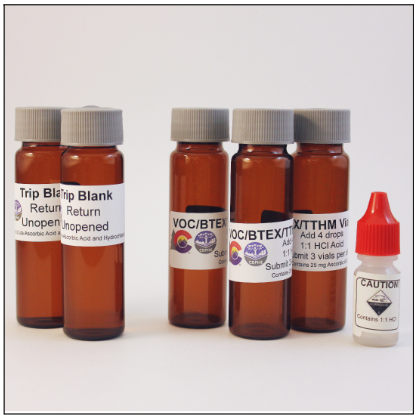
Three VOC/BTEX/TTHM vials must be submitted per sampling location. Trip blanks are always included with VOC/BTEX/TTHM vials.
*Subject to the organic testing schedule. Plan accordingly.
- If this is the first sample to be collected, turn on the cold water and let it run for 3-5 minutes. If you are collecting from multiple bottles and have already let the water run, continue to step 2.
- Slow the flow of water before collecting.
- Do not rinse the vial prior to collecting. The vial contains preservatives that are necessary for testing.
- Fill the VOC/BTEX/TTHM vials to the bottom of the vial neck, leaving room to add drops of acid.
- Using the HCl dropper bottle, add four drops of HCl to each vial. Only add drops of HCl after filling the vial with water to the bottom of the neck. If some of the ascorbic acid was accidentally washed out, use five drops of HCl and note it on the collection bottle and requisition form.
- Finish filling the vial drop-by-drop so that no air remains when capped and inverted.
- Place the cap straight down on the vial and securely tighten. Wipe off any sample that has spilled down the sides.
- Gently invert the vial several times to mix the acid and inspect for bubbles.
- If bubbles are present, remove the cap slowly and add water, but do not overfill.
- Refrigerate the water sample immediately after sample collection.
- Package vials in the bubble wrap they arrived in. Securely pack vials together with the trip blanks in a cooler with frozen cold packs. Do not open the trip blank vials.
- Wash hands thoroughly after collection.
Collection instructions by water package
Common water testing
- Annual Colorado package
- Drilling baseline package
- Deluxe Colorado package
- Expanded annual Colorado package
- General Colorado package
- Mining baseline package
- Real estate/HUD package
Specific substance testing
- Cyanotoxin testing
- EPA 524: Benzene, toluene, ethylene, and xylenes (BTEX) testing
- EPA 524: Total trihalomethanes (TTHMs) testing
- EPA 524: Volatile organic compounds (VOCs)
- EPA 524: VOC screen
- EPA 525: Semivolatile organic compounds (SVOC) screen/pesticide
- EPA 552: Haloacetic acids (HAAs)
- Metals scan package
- Organic chemical rules (SOC) package
- Regulation 11- TTHMs and HHAs
- Total coliform and Escherichia coli (E. coli)